GD-ROM "Swap Trick" Ripping Process
- The Main Guide
0.0 Disclaimer
Please note that producing a backup of your LEGITIMATELY OWNED Dreamcast games, using the methods described in this docuement (and all related pages on my website), for YOUR personal usage at home, is NOT illegal; or at least, definitely not in the UK. As for other countries - I have no idea, so consult your local solicitor now if you are concerned. Anyway, moving on...
1.0 Introduction
This document is a catalogue of my attempts to rip Dreamcast games using a PC, numerous CD/DVD drives, and the translated "swap trick" guides that exist. My main reasons for doing this guide are numerous. Firstly, the few documented working methods of ripping / backing up Dreamcast games are with fault - they are either too slow (e.g. transferring games via the DC's modem or serial port to a PC), or too expensive (e.g. buying a Broadband / LAN Adapter or DC Katana development unit).
This is problematic for anyone, say in the UK, who wants to exercise their right to a backup copy of their DC games - possibly to use in an emulator like Chankast - but who doesn't want to spend a fortune, or masses of their time, dumping games. Secondly, I was bored at the time and wanted to engage myself in something a bit (ahem) adventurous. for a change. =P
1.1 Getting started
Chances are that you are new to this method, in which case I'd recommend you print off and read both rip guides, links to (and local mirrors of) which are in section 1.2 of this guide (don't worry, they don't take too long to read =P), and also print off & read this document itself as it contains extremely important information regarding the ripping process. Make SURE that you do this first, because this guide assumes that you have read & understood them. However, in order to minimize confusion, I have tried my best to keep each section as clear and easy to follow as possible.
In the future, I think the best solution would be to combine the features of the best documents about / related to this process (which I tend to refer to as the "GD-ROM swap trick method"). They would be taken from StateS' ripping guide, Yursoft's ripping guide, maybe also the Kortex guide (it's an expansion of the one by Yursoft) and this page you are reading now (written & published by myself), into one reasonably-clear & easy to follow guide. As much debt as is owed to the writers / translators / etc of these guides, I still think there is room for improvement - just, don't hold your breath expecting me to write this "ultimate" ripping guide anytime soon =P
Definitions used in this guide:
-Any places where I refer to the "inetd / vagrantcharly / StateS guide" ALL refer to the same guide - basically, inetd was the original author, vagrantcharly (of Emuparadise) did an English translation of it, and StateS released the translation on MegaGames' forums in 2004. However, since I get impatient at times I don't tend to write out all three of their names, so I apologise for any confusion that may result.
1.2 Credits (no particular order)
NOTE: Mirrors of the above ripping documents are available here.
2.0 Preparing your PC for GD-ROM ripping using the ripping guides - The Hardware Side
2.0.0 Is there any risk that I could damage my drive by opening it up and / or performing the swap trick on it?
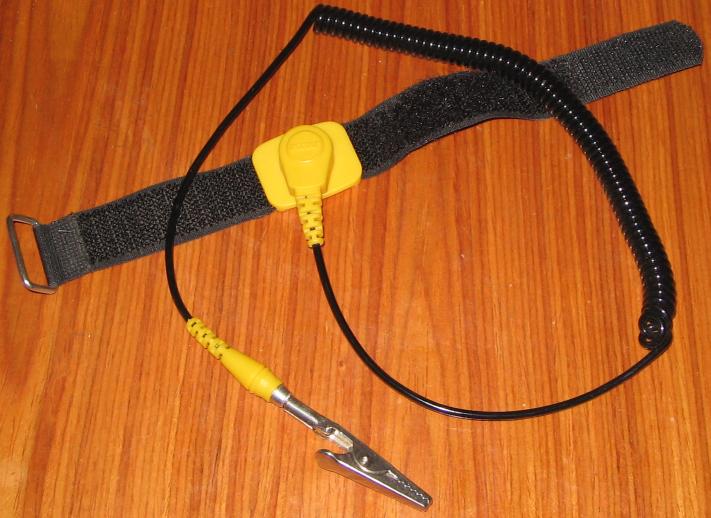
As long as you take care and don't do anything stupid with it, the chances of you damanging your drive are extremely low. I've opened up & tested a lot of drives myself (namely, all those on in my results document, except for entries credited to other people), and all of them were still working afterwards. And that's without wearing safety gear like an anti-static wrist strap, or working on an anti-static mat. To be on the safe side though, such equipment SHOULD be worn / used at all times. Did I mention I'm not responsible if you damage your drive doing this? Ah yes, I have now =P
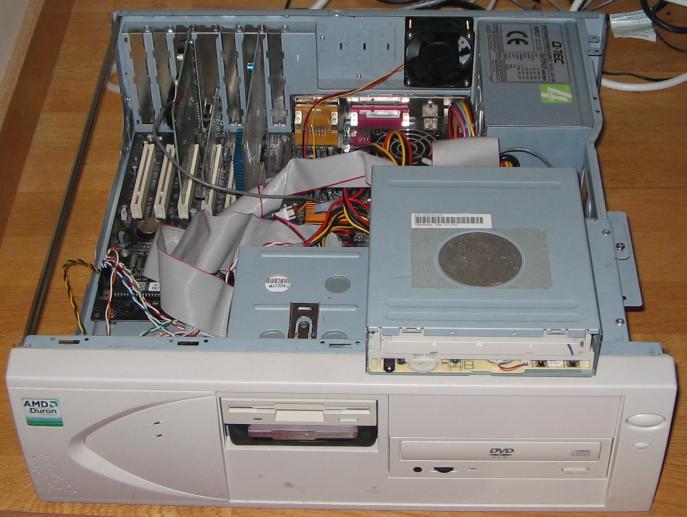
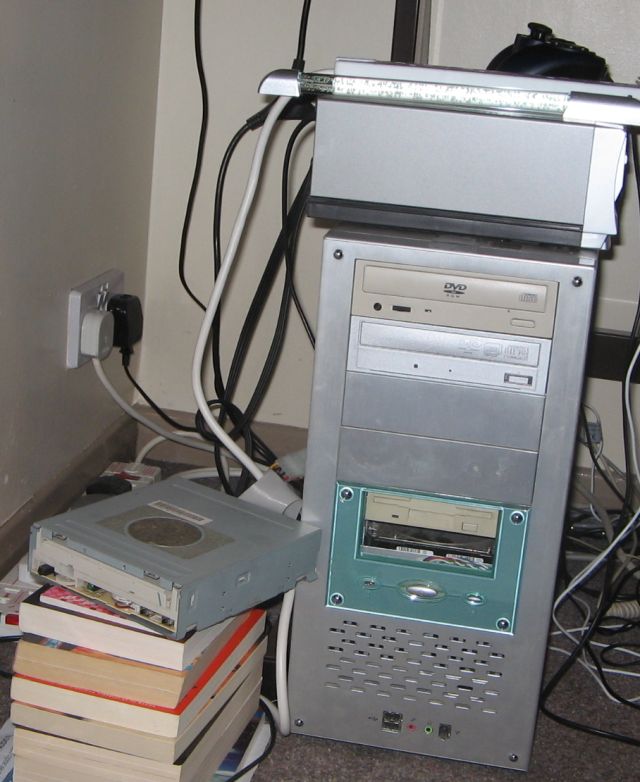
2.0.1 How should I lay out my PC for the job?
I'd recommend you place your PC in a space where you have easy access to all the insides; lay it on its side if it's a tower case as this will make things easier. Naturally you will need to have the case lid removed at all times so you can connect up your drive for testing and do the necessary disc-swapping.
2.0.2 What tools & other things will I need?
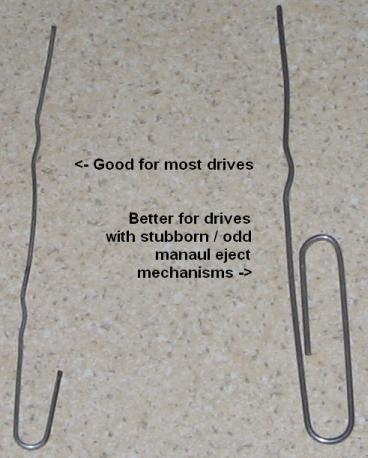
You'll need the following equipment:
2.0.3 What drive makes models should I be looking to test out / buy for testing & ripping?
If you want to rip GD-ROM discs fully (that is, a FEW games with single data tracks ONLY since there are still issues with extracting other DC games with single data tracks, and those with mixed data & audio tracks), you WILL need to get a LITE-ON LTD-165H DVD-ROM drive. But of course, it's not likely you'll have one of those, and obsessively trying to find one is not going to help much as I can do all the testing of this drive by myself. So you will need to look at getting at least one unique drive; just make sure it isn't one I've said is crap *anywhere* in this document.
If you already have CD/DVD[-ROM/-RW] drives in your main PC, and you want to test them out, just check they are not on the list of non-working drives first. However, if your drive(s) are on the non-working list and lacking model numbers beside the description, test it out anyway, as there can be many different models of the same drive type.
Same goes for if you are going to buy one, be it new or second-hand. Obviously I don't recommend that you buy loads of new drives, because you'll be pissing your money away, especially when some of them may be clones of each other, so reducing the effective yield of your bulk purchase. Take care with buying anything, period.
2.0.4 Are there any particular brands / models of drive that I should avoid at all costs?
There are quite a lot of specific models you should avoid. However, entire brands shouldn't necessarily be avoided (unless there is a half-decent amount of proof). A compiled list of drives that do and don't work, taken from numerous internet-based sources, can be found here. Please note that some drives originally in this compiled list have since been removed, because either me or someone else tested the drive (in which case it will be listed here).
Possible drive problems, and some known "crap" drives:
Construction of your drive could be an obstacle, like my broken Toshiba SD-M1502 DVD-ROM. Now, while this drive is broken (well, I DID get it for free =P), that didn't stop me from taking a look inside it. From doing this, I discovered that the disc fastener inside it has cross-headed screws which are VERY small (about 2-3mm wide) and shallow, so small that I had no screwdriver to hand that could remove them. So either those definitely remove the fastener (which itself is very big, spanning the entire width of the CD tray), or there's something else holding down the fastener, say, plastic clips at the sides. I didn't recall seeing anything like that last time I opened it for examination, but I'll have to double-check this soon. For now, if you happen to have this (or a similar) Toshiba drive, it's probably not worth you wasting your time to open it up if you can't get the damn fastener off, eh? =P
While I'm not sure if there any any Panasonic DVD-ROM drives out there, I recommend you don't buy any drives made by them in 1998 (or beyond, possibly) - I have a CD-ROM drive made by them in 1998, and despite my best efforts have been unable to remove the top of the drive. Perhaps it's superglued down or something (the integrated disc fastener may have something to do with it) but put simply, it makes taking an Acer 640A-272 apart look absolutely trivial. Also, since I've tested a newer Panasonic that has no disc fastener (see near the bottom of the results table) that couldn't rip anything, you'd probably best be avoiding all Panasonic drives, just to be on the safe side.
Try not to buy branded drives that could be clones of other drives, such as Samsung (which are clones of Ricoh drives), or re-branded Mediatek drives (other than LITE-ON) - see the clones list on the "Drive Results Table" footnote #3. Despite having similar parts, they most likely WILL NOT produce the same results as a real LITE-ON, even if the components in the drive have the same / similar numbering (e.g. MT1329E). The problem is that the firmware in these clones will often be slightly different; although, for clones of LITE-ON drives, it *may* be possible to, for example on the Sony DDU-1621, overwrite the (Sony) firmware with a vanilla LITE-ON firmware from this page. But I have never tried this out; you do so at your own risk!
A note about two DVD-ROM drives, namely the Afreey DD-4012E (though the PCB is printed with "DD-4010E" =P) and the BTC BDV-108A - both of these drives use almost identical PCB components, those being the Sony CXD3011R-1, Sony CXD1867R, and the Hitachi H8/3079. Some of the smaller components are differently numbered like the tiny Texas Instruments and Philips chips (and the tmTech T224162B EDO RAM chips run at different frequencies), but I wouldn't think any of those would make much difference to whether either drive could rip GD-ROMs or not. That is not for me to decide - those two drives I have are broken =P
2.0.5 Are the rumours true about certain Yamaha CD-RW drives being able to rip whole GD-ROM discs with a modified firmware?
To date,the only model that has been reported to be flashable to allow ripping of GD-ROM discs is the CDR-400t. Probably it will also work for the CDR-400c, as this is the same drive but with a caddy-loader instead of a tray-loader. A news post on this French forum also adds that there is a modded firmware for the Pioneer 303S DVD-ROM drive.
However, having been e-mailed these files by Karsten Kolb, he has told me that the Yamaha BIOS files were not actually modified by the person who first released them (Kalisto), but in fact were taken straight from the Katana dev kit R9 (confirmed by his analysis of Kalisto's BIOS file and one taken from the dev kit using Hex Workshop). He said that the Yamaha BIOS file does not actually work as intended when flashed to his CDR-400t - although it comes up OK in the Windows Device Manager, it does NOT allow for GD-ROMs to be read any easier than normal, because of a "Device Name Not Available ASYN - Start Unit Request Failed" error from his SCSI card.
He also mentioned that in the dev kit documentation, there is no indication that an authentic Katana GD-Writer (model HKT-0400) can read GD-ROM discs anyway. So unfortunately this BIOS is not of much use to us. :(
As for the Pioneer 303S firmware, Karsten has not been able to test this, because despite having the relevant drive, he is unable to flash the file to his drive because it is older than the firmware already present on it. But, despite this, he examined the modified firmware against an official Pioneer firmware from their website - the only different was that the bytes in the checksum were slightly different, while the contents of both files were otherwise identical.
StateS has said that there may be a modified firmware in existence to allow an older Yamaha, the CRW2100S, to read GD-ROMs natively, though I have not seen any firmware as of yet.
Finally, I have also heard speculation that another Yamaha CD-RW drive, the CRW-F1, can also be flashed with a modified firmware going around the Net. However - as with the CRW2100S - I have not yet seen any news articles or downloads perporting the actual existence of modded firmware for either of these drives. Chances are the rumour about the CRW-F1 is false.
2.0.6 Regarding drives from Plextor, Optorite & Sanyo that are capable of overburning CD-Rs to high capacities - is it possible for them to fully rip GD-ROMs?
Possibly. The reason for this is that the GD-ROM disc was designed specifically to avoid being read by anything other than a DC. Remember that putting a GD-ROM disc in a PC CD/DVD drive normally will only allow you to see the inner sector of the disc, which is the same density as a conventional CD-ROM - only the discs' outer sector has high-density properties, packing in about 1 GB.
As it stands, all of the current technologies to create large-capacity CD-ROMs, like Plextor's GigaRec and Sanyo's HD-BURN, rely on converting the entire disc to a higher density, not just a portion of it, allowing you to increase the capacity of a 700MB CD-R to 1GB, or a 900MB CD-R to 1.3GB (latter only applies to GigaRec). This means that the oversized discs still do not have the same density as a GD-ROM disc.
Of course, there is a chance these drives might work better with the swap trick in the ripping guides in section 1.2, but generally they are expensive and not worth buying just for testing - well, unless any of them happen to come up cheap on eBay or at a car boot sale.
2.0.7 What about those LG CD-ROM drives that are similar to the DC GD-ROM drive unit - is there any way to modify them to fully rip GD-ROMs?
(NOTE: The models being referred to here are the LG CRD-8160B and the CRD-8240B. As far as I know, no other models apply to this question.)
What's interesting about the aforementioned drives is that both use some components that are the same / similar to those inside the DC's GD-ROM drive.
For instance, inside the CRD-8160B, there is an Oak Technology OTI911 CD-ROM decoder and a Sony CXD3005R DSP, instead of the OTI912 & CXD3005R pairing in the DC's GD-ROM drive (both of which are combined into a single chip called the OTI9220). Though I have this LG drive, the motor inside it (or maybe the laser) appears to be worn out, so it cannot read any discs at all. But for 50 pence, it was hardly a bad purchase, if only for the research factor.
Meanwhile, in the CRD-8240B (thankfully mine works, though it did cost me about 20 times that of the aforementioned model =P), there is an OTI912, but a CXD3003R instead. Hence, neither drive is exactly similar to the DC's GD-ROM drive. Mind you, this would be impossible as it stands, because other photos of the DC's drive PCB reveal what appears to be a custom Sega chip on the board (though as the photos were of a different DC, it's possible that this was really an OTI9220 that had a Sega logo on it).
Now - although it's PURELY hypothetical - I have thought of modifying the LG CRD-8240B to *possibly* /fully read GD-ROMs by soldering off its CXD3003R DSP and soldering in the CXD3005R from the CRD-8160B, effectively making a drive with both core chipsets identical to those in the DC's GD-ROM drive. But I'm not considering this just yet for two important reasons:
A) Doing any kind of soldering work on the drives would be a pain in the arse, because both CXD300x chips are surface-mounted Quad Flat Packages (QFPs). And, as I'm sure you know, working on such chips can be a hellish experience without expensive kit (like the PDR Solderlight).
B) The *only* thing that enables the DC's drive to actually read GD-ROMs is believed to be it's firmware. But nobody's dumped / extracted it yet, possibly because it's in some kind of "undumpable" IC, like the SVP graphics chip in the Mega Drive release of Virtua Racing, or is on a chip with heavy encryption.
2.0.8 Is it possible to rip all type of DC games, e.g.those with audio tracks, bleemcast! titles, etc. ?
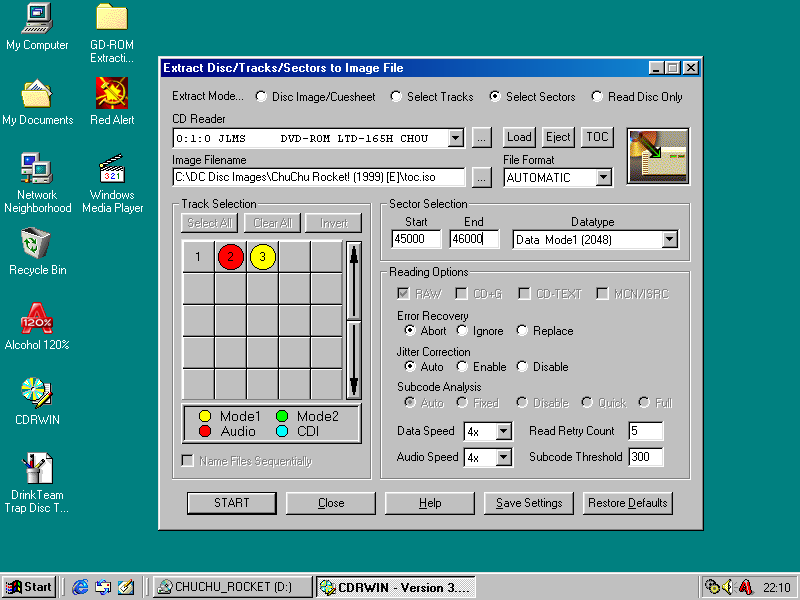
Varies. While it is possible to extract single data track DC games (which have one data track in the high-density region from sector 45000 to 549100), success with mixed audio & data track games has been patchy - please see results table footnote no. 2 for more details. One thing is certain though - even where it's possible to dump mixed-track games, currently there is no utility in existence to create self-booting images of them with the CDDA tracks. Not yet, anyway.
Also, even if you can extract an entire single data track DC game (or the second / ending data track of a mixed audio & data track DC game) without ANY errors in CDRWIN, this does not mean your rip will necessarily be completely uncorrupted. See my "Other Essential Guides" document for info on verifying some of the files inside DC ISOs.
Concering ripping audio tracks; an updated version of the GD-ROM swap trick ripping guide (originally written by inetd) by Yursoft has been posted on EmuTalk by StateS. Using information in his partial translation of it, I have been able to rip a BIN file of all the ChuChu Rocket audio tracks without any errors.
But, contrary to what is stated in the guide, the tracks are not extractable using GD Lister because I am never prompted for the source audio file. Initially I thought this is because GD Lister v1.7 may not work with it - but having got hold of v1.6 (the same as mentioned in Yursoft's guide) from Karsten I still get no prompt for a source file after specifying the starting LBA of any audio track.
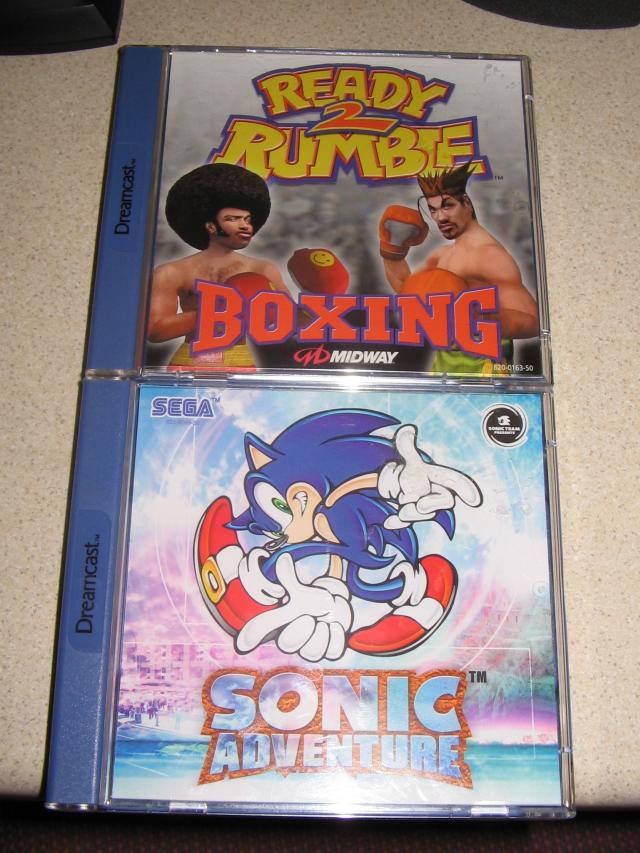
For now though, using information from the ChuChu Rocket TOC file, I have manually cut & extracted the CDDA tracks from the BIN file into individual WAV files using Audacity, and have also done the same with my Ready 2 Rumble CDDA tracks. All that's needed now is a way to insert these into a self-booting CDI image.
As for bleemcast! titles, they are in a proprietary format called MIL-CD which I cannot find any info about on the Net. In an ordinary CD/DVD drive they appear to be a single audio track of about 600kb. Ripping it to an image file is possible, but all it is (for me anyway) is a file full of null data, which is useless. It is possible to play them directly in Chankast by putting it in a CD/DVD drive and selecting the relevant drive letter; however after the BIOS screen Chankast crashes with an illegal operation error.
Someone asked me whether NAOMI discs would be rippable using my method; the answer is, maybe. Unfortunately, they require small security chips to work properly, and I have no idea how to crack or dump the security chips.
2.0.9 How should I dismantle my drive? Is there a correct order for removing each part?
The order I use to gain access to the inside of all the drives I've taken apart to try with the GD-ROM swap trick process is as follows:
2.1 Preparing your PC for GD-ROM ripping using the ripping guides - The Software Side
2.1.0 What's the best version of Windows to be using this ripping guide with?
I have used this ripping guide in Windows 98 SE and Windows XP Pro and had no difficulties whatsoever. But it can probably also be done in Windows 2000 and / or Server 2003 as they are more or less the same as Windows XP. For Windows 95 and NT 4, I really have no idea whether all the stuff will work or not. Good luck if you have one of those last two systems, then =P
2.1.1 What applications will I need to carry out this ripping?
You will need only one file - which is the GD-ROM ripping toolkit (for Windows only), containing *every single* app and utility that is described in the StateS and Yursoft ripping guides*, and in the guides I have written myself. Some things inside it DO need to be downloaded though, like CDRWIN, because I have limited webspace - so I've put a link to it inside the toolkit. Get it from the front page, or if pressing the Back button is too much effort, click here to download it. =P
*I have actually left out one utility that is mentioned in the Yursoft guide - it's the one called GDFixer / GDK. The reason I have done this is because its patching functions are all done by ExoBoot, so there was no need to include this as a result.
2.1.2 How do I create and / or burn the GD-ROM trap discs?
Trap discs are mentioned in both the StateS and Yursoft ripping guides; these are what you need to extract data / audio tracks from your target GD-ROM discs. While they are mentioned in both guides, and while both explain methods of making them, there is little clarity on what you actually need to put ON the discs, data or audio-wise.
Hence, this section will plug that gap for you; what follows is an explanation of how to use both the two pre-made trap discs that have been released on the Net, and also two methods of producing your own trap discs.
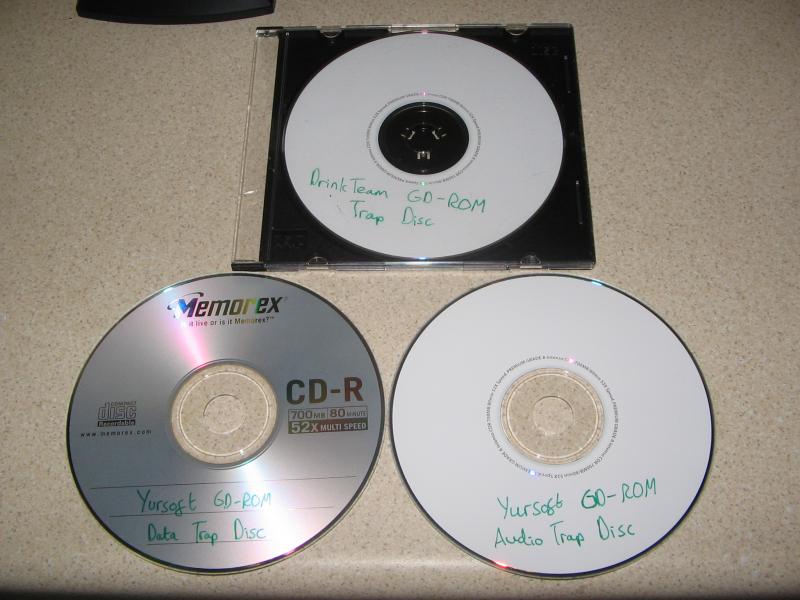
Pre-made Trap Disc #1, produced by DrinkTeam
Released in 2001, and quite hard to find on the Net nowadays. I recieved it attached to an e-mail from Karsten Kolb - many thanks to him for this, saved me a ton of Google searches :)
From first impressions of the mixed-mode track layout of the disc, it appeared to have combined audio & data ripping capability into one 70 MB disc image file.
However, my hopes were dashed - after repeated testing of both methods of CD audio extraction (of all tracks into a raw BIN file, and also of tracks onto seperate WAV files) I could not manage to get anything. So it seems that only data extraction is possible with it; I have not been able to get it to rip CD audio on any other drive with this disc, either.
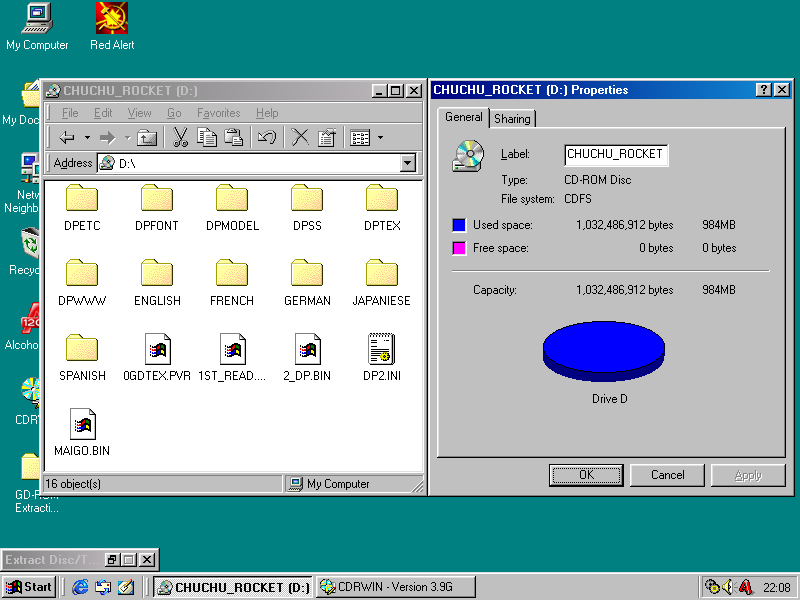
On the plus side though (but only under Win98 SE, for some reason) it does allow you to view the files & directories on the high-density sector. You can't copy them - at least I haven't been able to copy any ChuChu Rocket files in this way using my LITE-ON drive - but it's a neat trick, to say the least.
If you want to use this trap disc image, it can be found in my GD-ROM ripping toolkit on the front page of the GD-ROM section of my site. Using it is easy, just burn it in CloneCD - it may work in others, but no other CD burning apps have been tested with it - and use it as directed in one of the main GD-ROM ripping guides.
Pre-made Trap Disc (Set) #2, produced by Yursoft
Released in 2002 by Yursoft. Props to StateS for pointing me to both of these - I didn't even know they existed until he mentioned them! This set comprises two trap disc images; one for ripping audio tracks, the other for ripping data tracks, and have a combined size of just 4.55 MB. These should be your first choice for ripping under any circumstances.
As with the DrinkTeam trap disc, the Yursoft trap discs can be found in my GD-ROM ripping toolkit. Using it is easy, just burn it in CloneCD - it may work in others, but I've never tried burning it in anything else (e.g. Nero) - and use it as directed in one of the main GD-ROM ripping guides.
Home-made Trap Disc Guide, produced by inetd, expanded on by myself
Basically, in the inetd guide, it does tell you how to modify the all-important CCD file that you get whenever you dump a disc image with CloneCD. Confusingly, though, it didn't tell you what sort of CD it had to be, or if it had to be of any particular capacity, and so on. So to try and rectify this, I have written two (relatively) detailed guides on how to create your own audio & data extraction trap discs.
How to create an audio trap disc:
How to create a data trap disc:
* The file you create in WinWaster can actually be of any size - the reason I thought it had to fill the disc is because I read a post by El_Maska_45 on Sonic-CulT in July 2004, where I recall him saying that the trap discs (and the images of them) were "filled up" - but he didn't have them on him. With no other info to go on at the time, I took this rather literally. Mine work perfectly though, and they seem to work as well in practice as the Yursoft ones, so I can't say I was disappointed.
2.2 OK, I've read all of this - what next?
Print off and read the ripping guides found here. Now that you have trap discs (so you can miss out how to make them in both guides), and the hardware & software sides of your PC sorted out, you're all set to get down to ripping stuff. So have a go at it - and if you did manage to get an ISO dumped of a DC game, click here to progress to "Other Essential Guides" so you can, basically, turn that ISO into something usable.
3.0 The End
That's all for now - apologies if your head exploded while trying to digest all of that information!
3.1 Copyright Information
Unless otherwise stated, all of this information was written by myself (RobbyW / STC-Fan / zedeckseightyone) ©2004-2008 or adapted from sources who have helpfully contributed information to this document. You may NOT use any information from this document unless you ask nicely beforehand, or something like that.